
-
Email Us:
thomas@beardedplumber.com -
Email Us:
thomas@beardedplumber.com 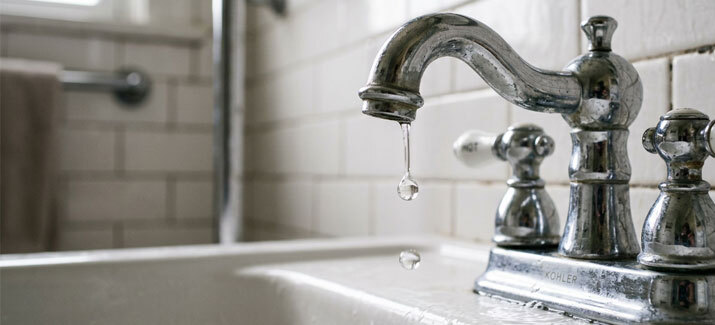
_____________________________________________________________________________________
A bathtub faucet leaking steady drops of water down your drain is a headache you should not ignore. That persistent drip creates annoying background noise, wastes thousands of gallons of water every year, and drives up your monthly utility bills.
Understanding why your leaking bathtub faucet is dripping helps you decide whether you can handle a quick repair yourself or need expert help. This guide explains the root causes of a faucet leak and walks you through the exact steps to fix it.
A bathtub faucet leaks most often because an internal mechanical component has failed behind the wall or inside the spout. Plumbing valves hold back water pressure constantly. When internal rubber or plastic parts age, water pushes past them. Here are the top reasons your faucet leaking issue is happening:
Rubber washers and O-rings create a watertight seal when you turn off your faucet handles. Every time you turn the handle, these rubber parts rub against metal components under pressure. Over several years, friction wears down the rubber.
The washer cracks, hardens, or flattens out. Once the seal breaks, water slips past the valve stem and runs straight out of the spout.
Hard water contains high levels of dissolved calcium and magnesium. As water sits inside your valve assembly, these minerals solidify into crusty deposits known as scale. Mineral scale acts like sandpaper against internal rubber components.
It scratches valve surfaces, cuts through soft seals, and prevents the valve from closing completely. In regions with hard water, mineral scale is a primary reason a bathroom tub faucet leaking problem starts prematurely.
Modern tub systems often rely on a single lever to control temperature and water flow. Inside the wall, a plastic or brass cartridge directs the water stream. Internal seals inside the cartridge deteriorate from age, heat, and pressure. When a cartridge cracks or loses its tight seal, water continuously trickles into the tub spout even when the handle sits in the off position.
The valve seat connects the faucet mechanism to the water pipes inside your wall. Water flowing through the valve seat can cause corrosion over time. Sediment buildup worsens this effect. A corroded valve seat becomes rough and uneven.
Even if you install a brand-new rubber washer, a rough valve seat will cut through the new rubber within weeks, causing the leaking faucet to return.
In many bathrooms, the tub spout and showerhead connect to the exact same mixing valve behind the wall. If you notice your shower faucet leaking alongside your tub spout, the culprit is almost always that shared mixing valve.
A diverter valve directs water upward to the showerhead when you pull the gate on the tub spout. If the main valve cartridge fails, water pressure feeds into both pathways. Water may drip from the tub spout while a slow stream trickles out of the showerhead above. Fixing the single main cartridge inside the wall stops both drips at once.
A slow drip seems harmless, but ignoring a faucet leak leads to expensive damage over time. Water is relentless, and unattended plumbing failures create widespread problems across your home.
Before buying replacement parts, you must identify the style of your faucet setup. Bathrooms generally feature one of two configurations: single-handle or double-handle systems.
These setups use a single lever or knob that turns left for hot and right for cold. Single-handle systems utilize a cartridge or ball valve. If a single-handle setup drips, you almost always need a complete cartridge replacement.
These setups feature separate controls for hot and cold water. Double-handle systems use stem valves with compression washers or ceramic discs. To find out which side is leaking, feel the temperature of the dripping water.
Warm water points to the hot stem valve. Cold water points to the cold stem valve.
Learning how to fix a leaking faucet saves money and prevents water damage. While complex valve replacements behind the tile require a licensed plumber, replacing a worn cartridge or washer is a manageable project. Follow these steps carefully to complete your bathtub faucet repair.
Never start any plumbing repair with the water pressure on. Locate the main shut-off valve for your home or the localized shut-off valves for your bathroom fixtures.
Turn the valve clockwise until it stops to turn off the water supply. Test the shut-off by turning on the tub handles. No water should flow.
Open the tub handles fully to relieve pipe pressure. Allow all remaining water inside the riser pipes to drain down the tub basin. Cover the tub drain with a towel or rubber stopper. This prevents small screws, washers, or tools from falling down the drain pipe.
Look for a small decorative index button on the front or side of your faucet handles. Pry it off gently using a flathead screwdriver to expose the handle screw. Unscrew the screw and remove the handle by pulling it straight off the stem.
If the handle sticks due to mineral buildup, spray it with penetrating oil or use a handle puller tool. Next, unscrew or slide off the decorative sleeve and the metal trim plate attached to the wall.
With the wall plate removed, you will see the valve stem protruding from the wall cavity. For a double-handle compression faucet, use a wrench to unscrew the stem assembly bonnet nut. For a single-handle cartridge system, pull out the metal retaining clip at the top of the valve body using needle-nose pliers. Pull the old cartridge straight out using pliers or a specialized cartridge puller tool.
Examine the old parts closely. Check rubber washers for cracks, rips, or flattening. Look at the plastic or brass cartridge body for cracks and worn O-rings. Take your old parts to a local hardware store to buy exact matches.
Replacing worn rubber washers and O-rings, or swapping in a brand-new cartridge, ensures a proper fit and a tight seal.
Coat new rubber O-rings lightly with heat-resistant silicone plumber’s grease. Insert the new cartridge or refurbished stem assembly back into the valve body. Reinstall retaining clips or bonnet nuts securely.
Slide the trim plate back against the wall, reinstall the faucet handles, and tighten the handle screws. Slowly turn on the main water supply and test your tub for smooth operation and leaks.
Having the proper tools nearby keeps your repair running smoothly. Here is a quick list of equipment needed before starting:
Homeowners in Florida face specific plumbing challenges due to local environmental conditions. Florida relies heavily on aquifer water drawn through limestone rock layers. This groundwater contains heavy concentrations of calcium carbonate and dissolved minerals.
When hard water flows through your home’s pipes, minerals cling to hot surfaces inside mixing valves. Over time, these mineral crusts destroy rubber seals far faster than soft water does. Additionally, high municipal water pressure in coastal developments puts added stress on aging pipe joints and valve cartridges. Installing a whole-home water softener helps protect new plumbing parts from aggressive mineral buildup.
Preventive maintenance keeps your plumbing system operating smoothly and extends the lifespan of your fixtures.
If your faucet drips after installing a new cartridge, the brass valve seat inside the wall may be scratched, chipped, or corroded. Water bypasses the new cartridge through microscopic gaps in the seat. You may need to resurface or replace the valve seat using a seat wrench tool.
Yes. Internal valve leaks frequently run backward along the valve body inside the wall space. Unseen moisture absorbs into wall insulation, wood framing, and drywall. Within 24 to 48 hours, mold spores can begin growing inside the dark wall cavity.
Replacing washers or an O-ring yourself costs under $10 in basic materials. Buying a replacement valve cartridge costs between $20 and $75 depending on the brand. If the valve body behind the wall is severely corroded or requires soldering, professional plumbing repair typically ranges from $150 to $400.
Most high-quality valve cartridges last between 8 and 12 years under normal conditions. However, in regions with hard water or high mineral content, cartridges may fail in as few as 3 to 5 years without proper water filtration.
If your faucet is under 10 years old and the outer finish looks good, replacing internal cartridges or rubber seals is usually the best approach. If the outer finish is corroded, the handles are stripped, or the valve body behind the wall is damaged, replacing the entire fixture is the smarter choice.
A persistent drip wastes water, raises utility costs, and risks structural damage inside your walls. While simple washer changes are doable for handy homeowners, complex valve body replacements behind tile require expert hands.
When you need fast, reliable plumbing solutions, turn to the licensed team at Bearded Plumber. Our experienced technicians diagnose hard-to-find leaks, replace worn valve cartridges, and restore your bathroom fixtures quickly.
Do not let a leaking faucet damage your home. Contact Bearded Plumber today to schedule your faucet repair and keep your plumbing running smoothly!